Domain Verification Guide
Set up DKIM, SPF, and DMARC for your domain.
Set up DKIM, SPF, and DMARC for your domain to improve deliverability and protect your sender reputation.
Email authentication proves to receiving servers that your emails are legitimate and haven't been tampered with. If you're new to email infrastructure, learn how email actually works first. Without authentication:
The Wraps CLI can automatically create all required DNS records during wraps email init if you have the appropriate environment variables set for your DNS provider.
| DNS Provider | Required Environment Variable | Optional |
|---|---|---|
| AWS Route53 | (uses AWS credentials) | AWS_PROFILE |
| Vercel DNS | VERCEL_TOKEN | VERCEL_TEAM_ID |
| Cloudflare | CLOUDFLARE_API_TOKEN | CLOUDFLARE_ZONE_ID |
Create an API token at vercel.com/account/tokens
export VERCEL_TOKEN=your_token_here# Optional: for team accountsexport VERCEL_TEAM_ID=team_xxxxxCreate an API token at dash.cloudflare.com/profile/api-tokens. The token needs Zone.DNS (Edit) permission.
export CLOUDFLARE_API_TOKEN=your_token_here# Optional: auto-detected if not setexport CLOUDFLARE_ZONE_ID=your_zone_idNo additional setup required if you have a hosted zone for your domain. The CLI uses your existing AWS credentials.
Skip manual DNS setup
With automatic DNS management, you can skip Steps 2-4 below. The CLI will create DKIM, SPF, DMARC, and MX records for you during wraps email init.
If you prefer to add DNS records manually, or your DNS provider isn't supported, follow the steps below.
npx @wraps.dev/cli email domains add -d yourdomain.comAfter adding your domain, SES generates 3 DKIM tokens. You need to add these as CNAME records in your DNS.
npx @wraps.dev/cli email domains get-dkim -d yourdomain.comSES will display 3 CNAME records that you need to add to your DNS:
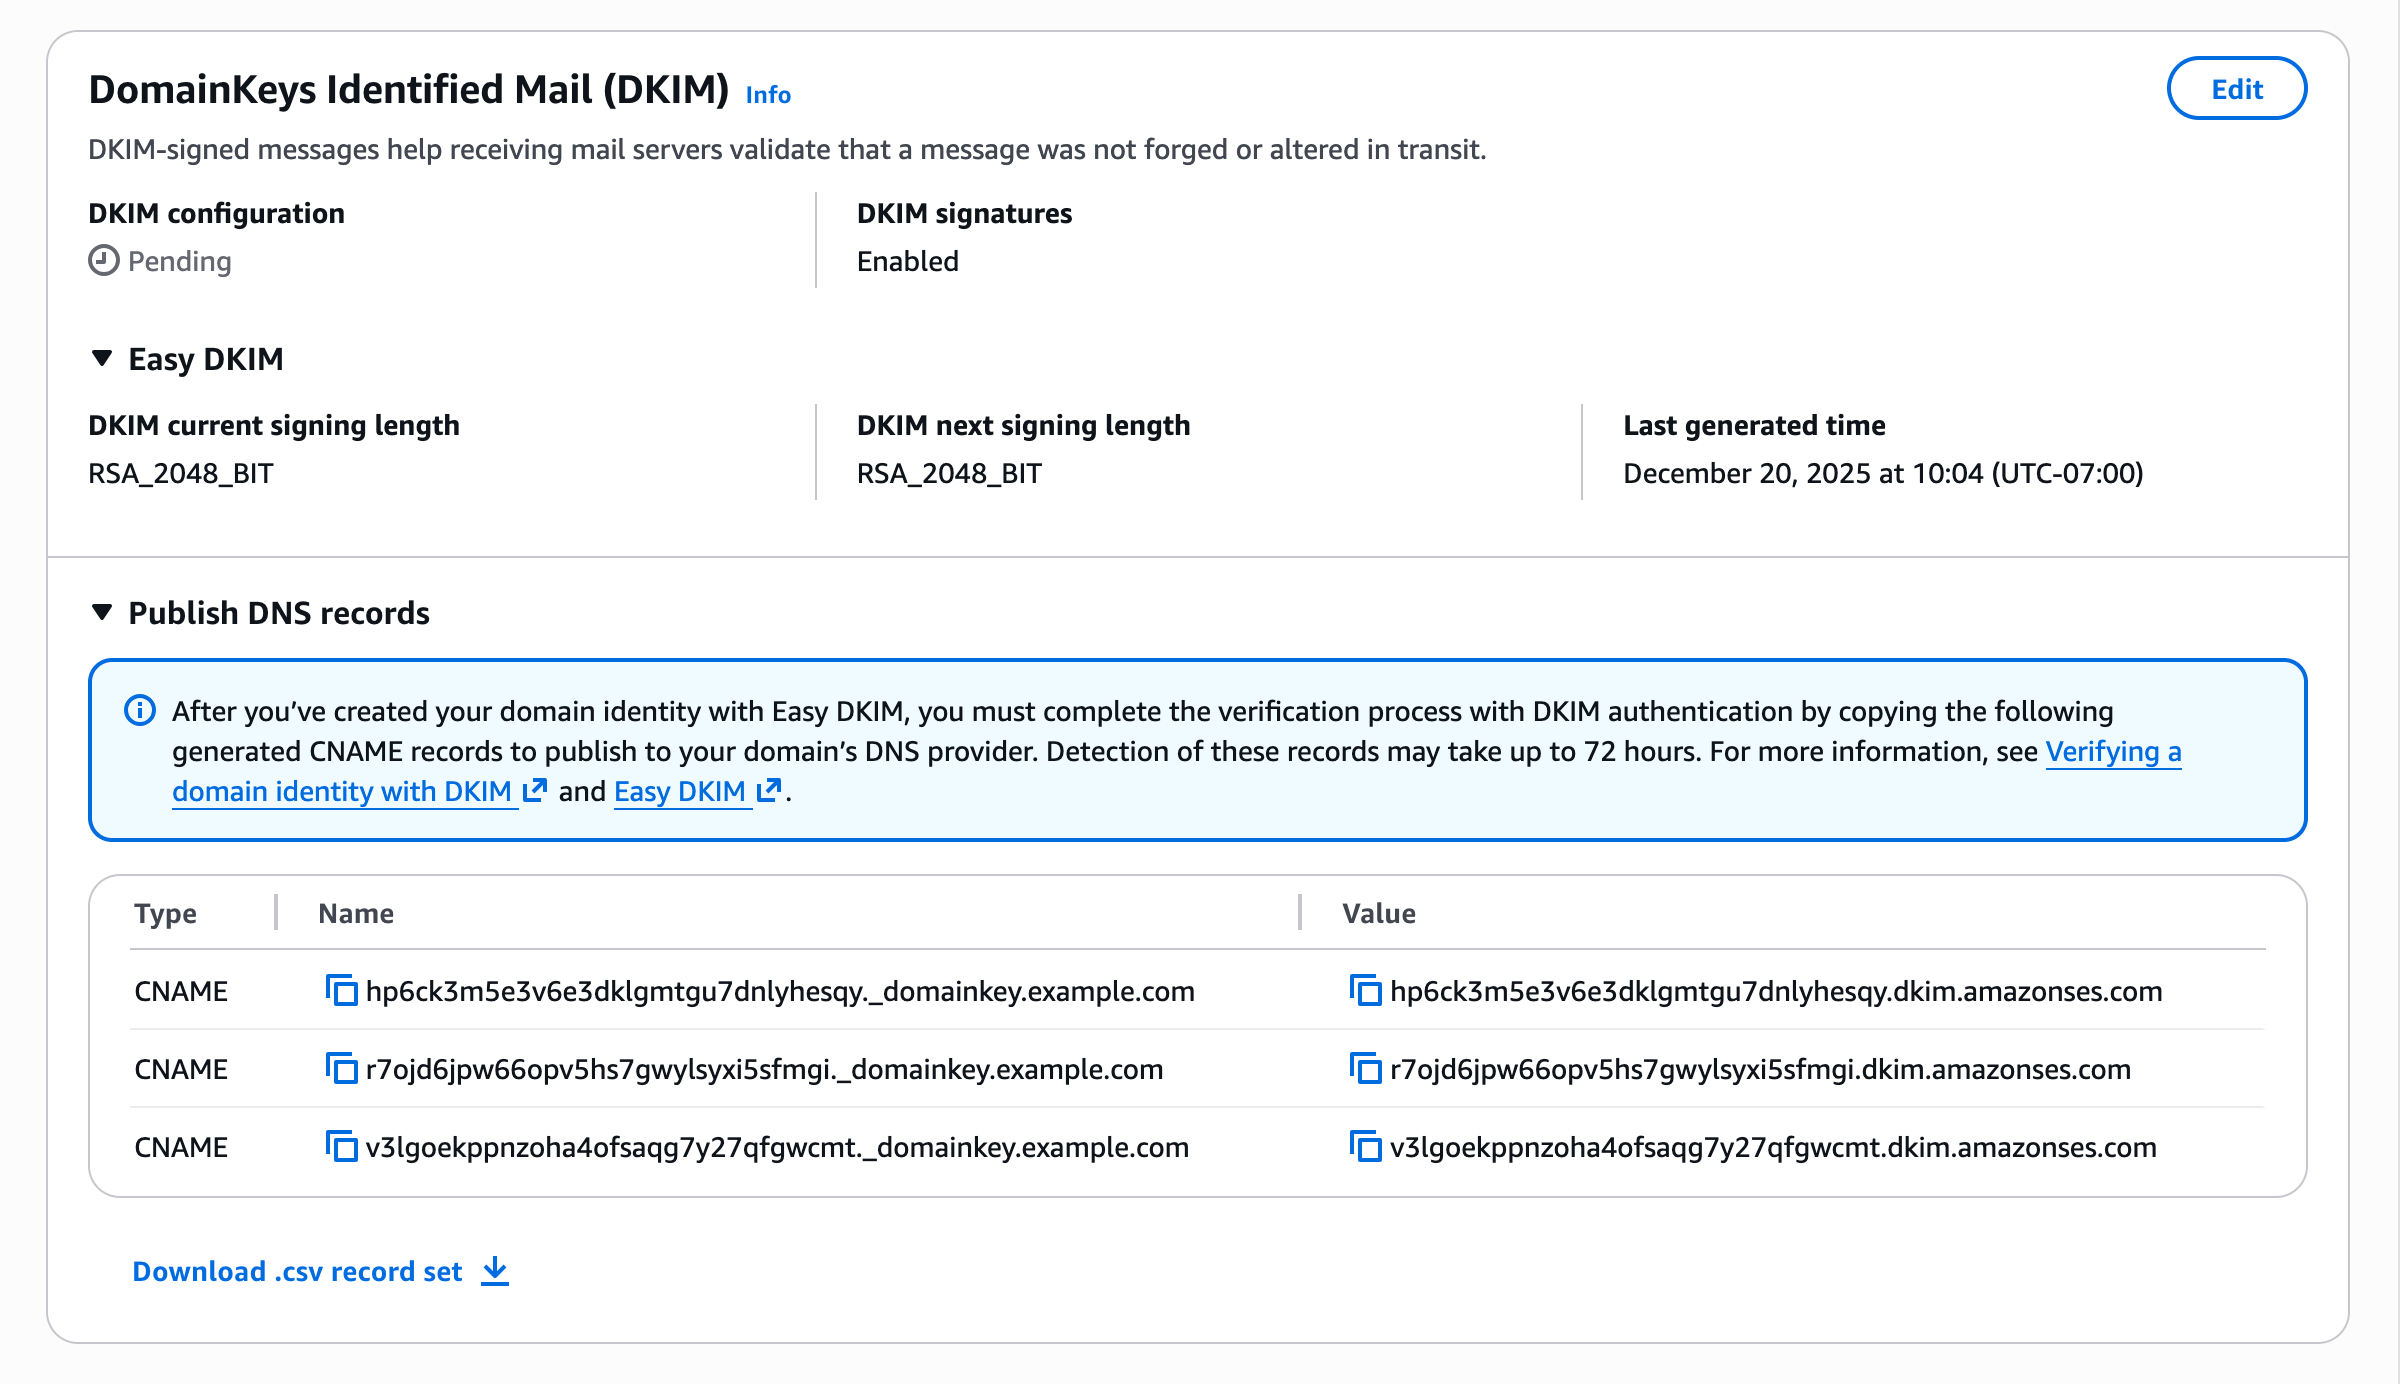
Copy all 3 CNAME records and add them in your DNS provider (Route 53, Cloudflare, Namecheap, etc.). The format looks like:
# You'll get 3 CNAME records like this:abc123._domainkey.yourdomain.com → abc123.dkim.amazonses.comdef456._domainkey.yourdomain.com → def456.dkim.amazonses.comghi789._domainkey.yourdomain.com → ghi789.dkim.amazonses.com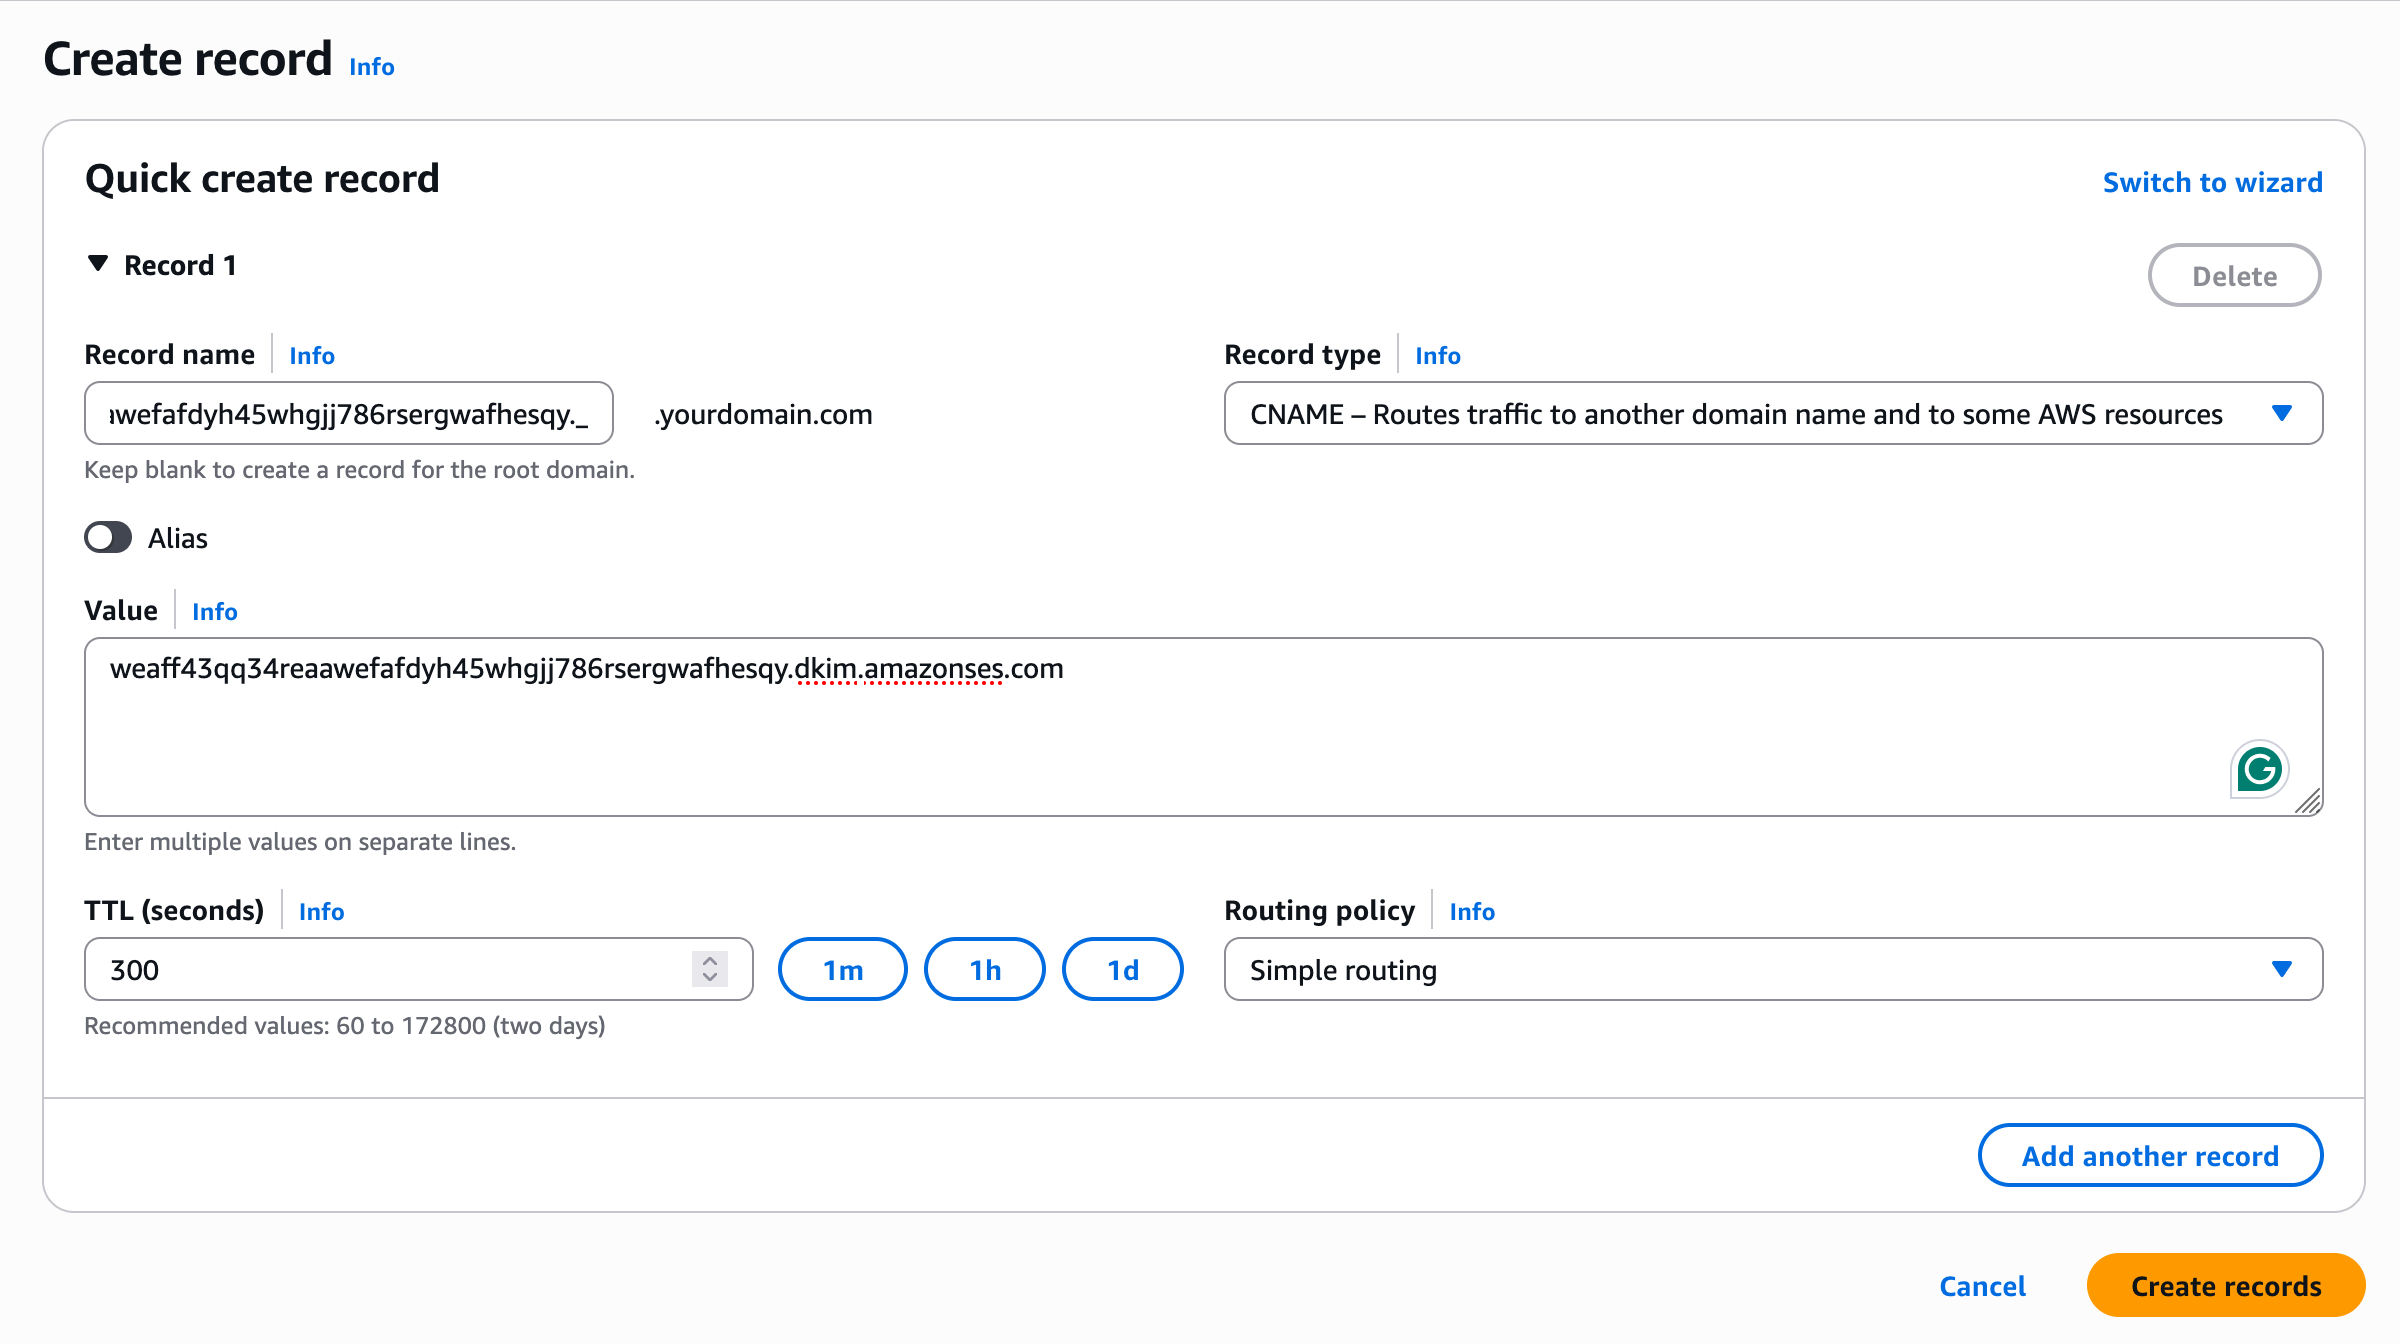
Important: Record Name Format
Copy the exact record names from SES. Don't add extra underscores or modify them. Some DNS providers automatically append your domain, so you may only need to enter the part before your domain name.
Good news: SPF is automatic!
When you send through Amazon SES, the MAIL FROM domain is a subdomain of amazonses.com, which already has SPF configured. No additional setup required.
If you want to use a custom MAIL FROM domain (advanced), see the AWS documentation.
DMARC tells receiving mail servers what to do when emails fail authentication checks. SES will prompt you to set up DMARC:
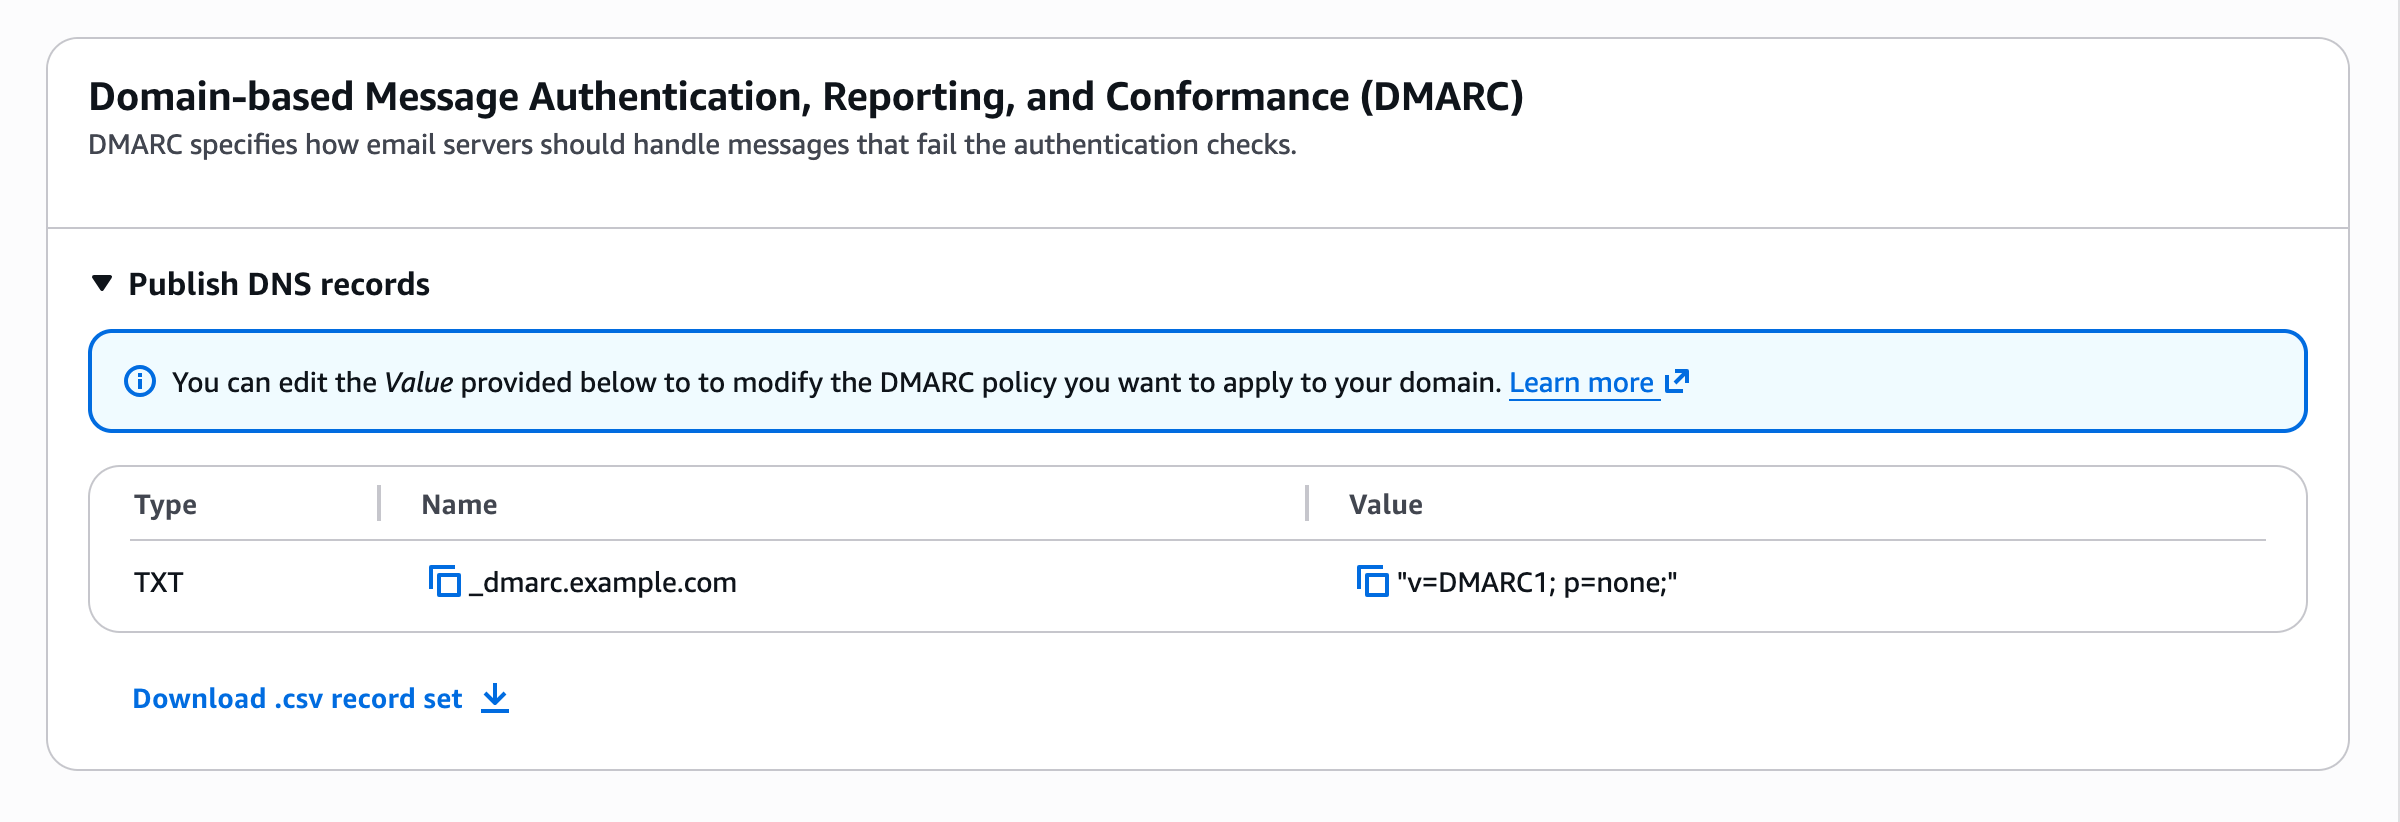
Add this TXT record to your DNS:
# Add this TXT record to your DNS:Name: _dmarc.yourdomain.comType: TXTValue: v=DMARC1; p=quarantine; sp=quarantine; np=reject; rua=mailto:dmarc@yourdomain.com| Policy | Value | Action |
|---|---|---|
| Monitor | p=none | No enforcement, just collect reports |
| Quarantine | p=quarantine | Send failing emails to spam |
| Reject | p=reject | Reject failing emails entirely |
Recommended: Start with quarantine
Use p=quarantine to start. Once you've confirmed all legitimate emails pass, you can upgrade to p=reject.
After adding DNS records, verify everything is configured correctly:
npx @wraps.dev/cli email domains verify -d yourdomain.comDNS propagation takes up to 72 hours
DKIM verification typically completes within a few hours, but can take up to 72 hours for DNS to propagate worldwide.
Now that your domain is verified, request production access for faster approval.
Production AccessStart sending authenticated emails with the Wraps SDK.
Email Quickstart